Groups are a tool to allow you to customise your schedule for your company. Sick of only being able to view employees alphabetically or grouped by job role? We feel your pain. Instead, create custom groups to categorise your team, grouping all customer-facing employees together or ordering by department as you see fit.
Go to Company Settings > Team > Groups
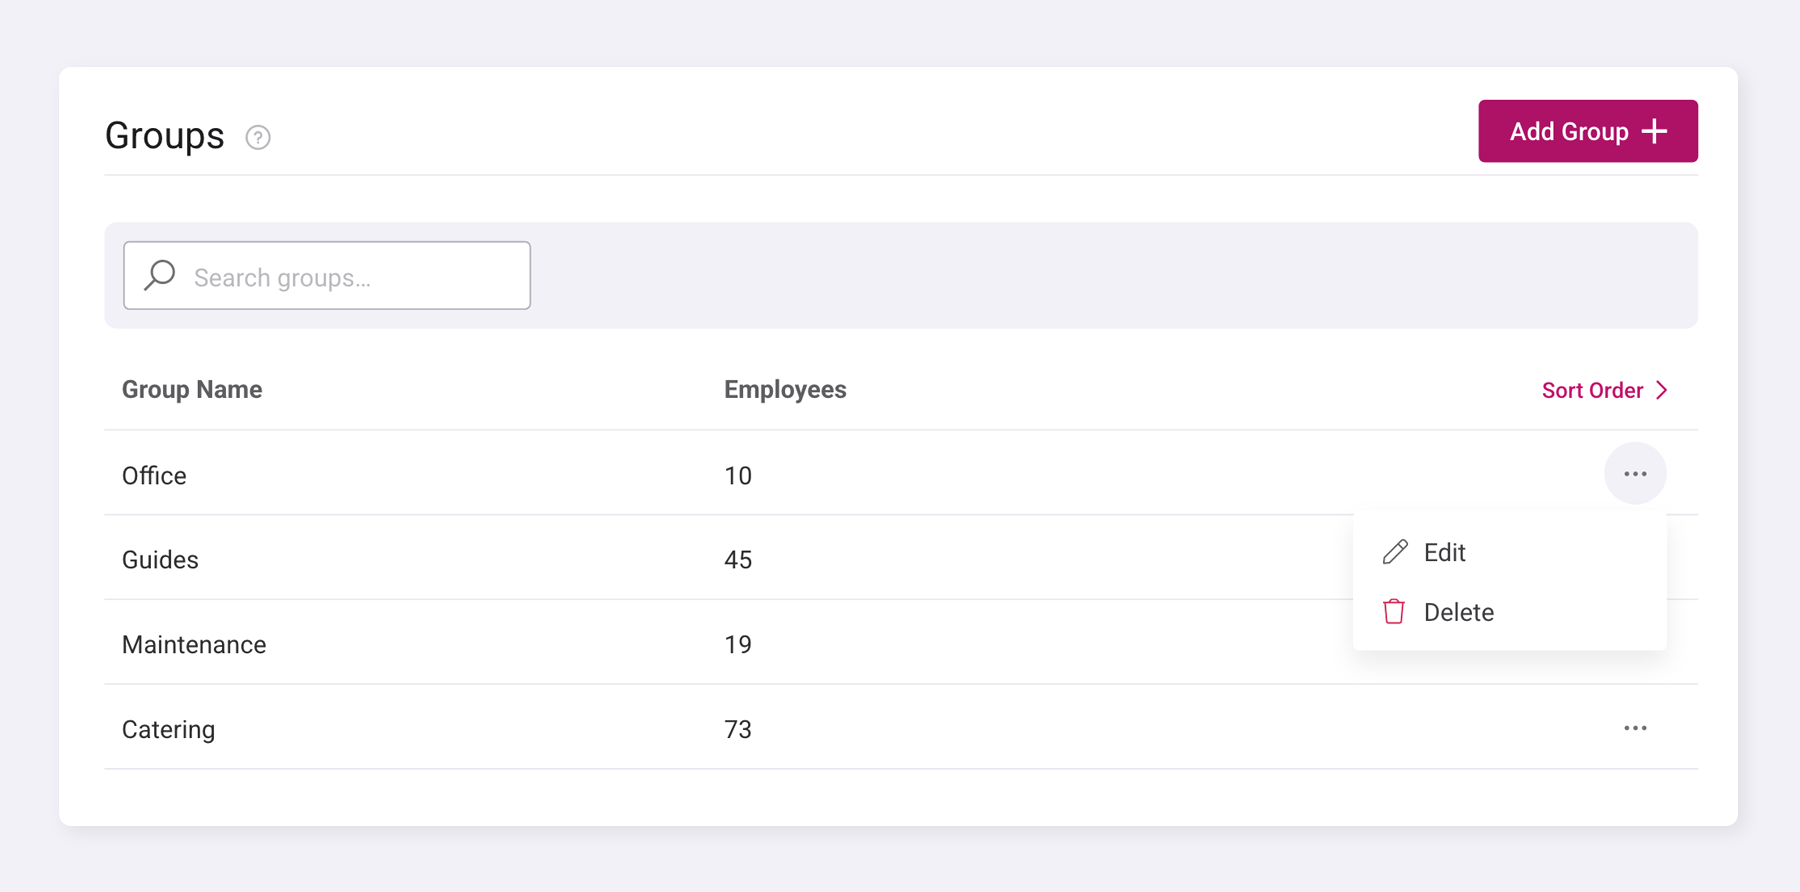
Here you'll see any groups that have already been set up for your account.

Add new groups by clicking the 'Add Group' button at the top of the page. Enter the group name, then click the Save button. Your new group will be added to the list, ready for you to start assigning it to employees.
Want to edit an existing group? Just look for the three dots next to the group name. Click those dots and choose 'Edit' to modify the group name. If you need to remove a group completely, click those same three dots and select 'Delete' instead.
How do I change the group display order on the schedule?
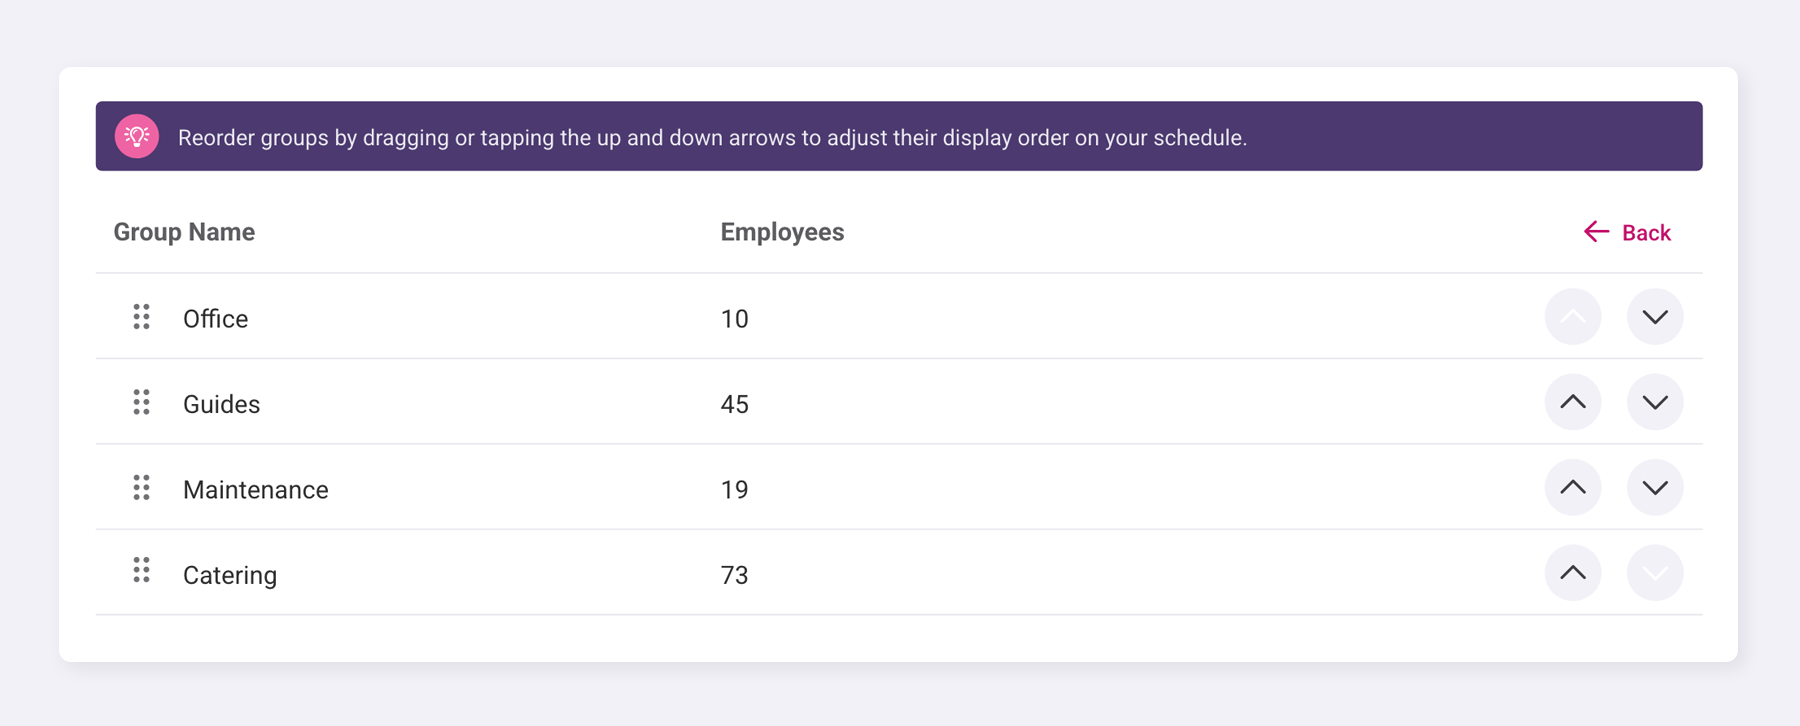
If you want to change the order in which your groups display on the schedule simply click Sort Order and drag them to your preferred position or use the up/down arrows.

How do I assign an employee to a group?
Go to Team > Employee > Employment Details
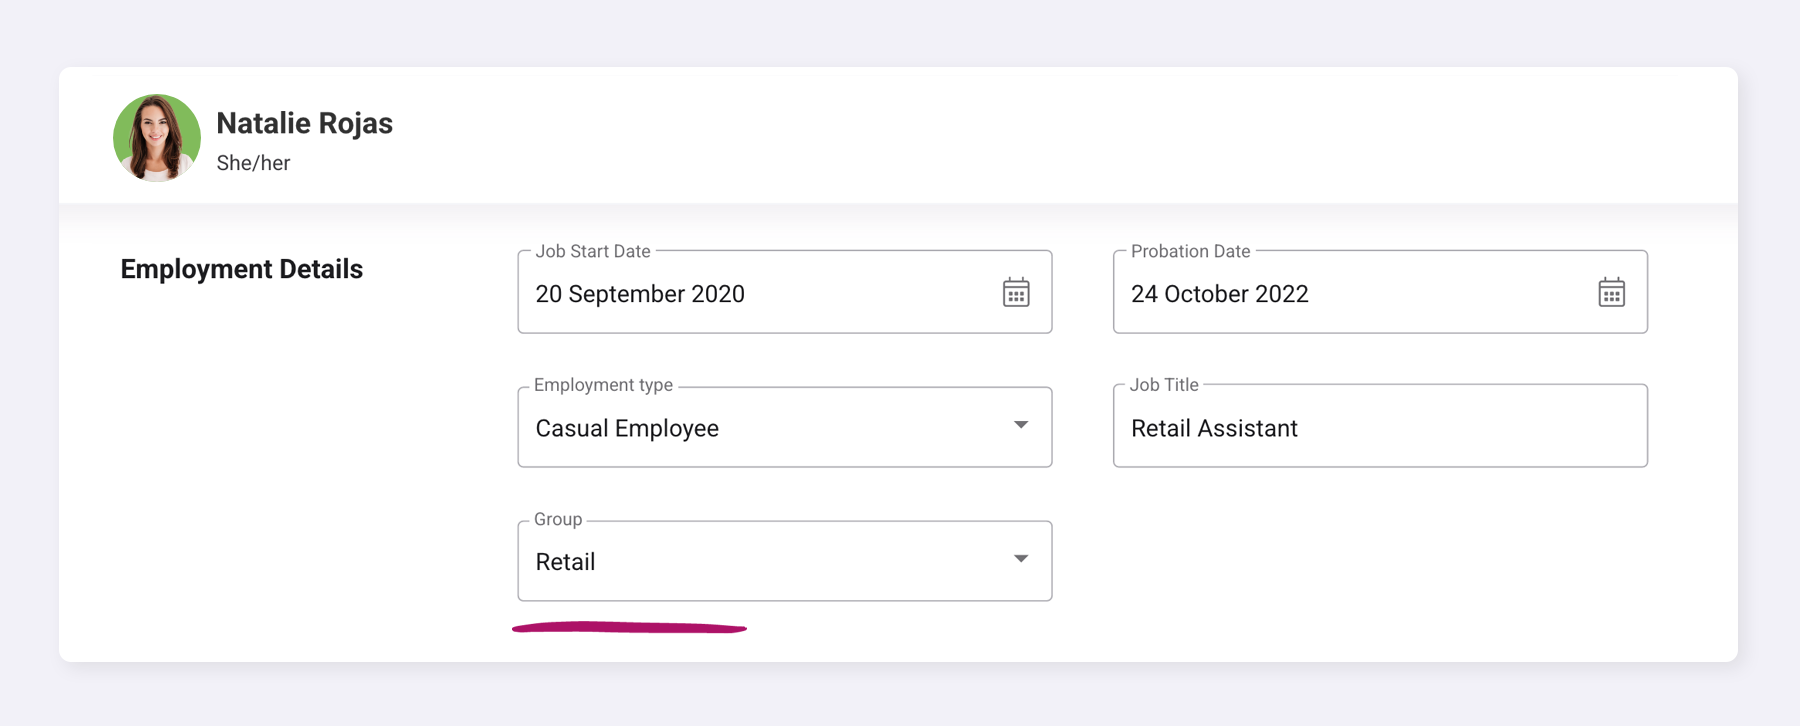
To assign an employee to a group, go to your team page and select the employee you'd like to assign a group to. Next, click on the 'Employment Details' and use the 'Employee Group' dropdown to select the group you'd like them to be assigned to.

How do I view groups on the schedule?
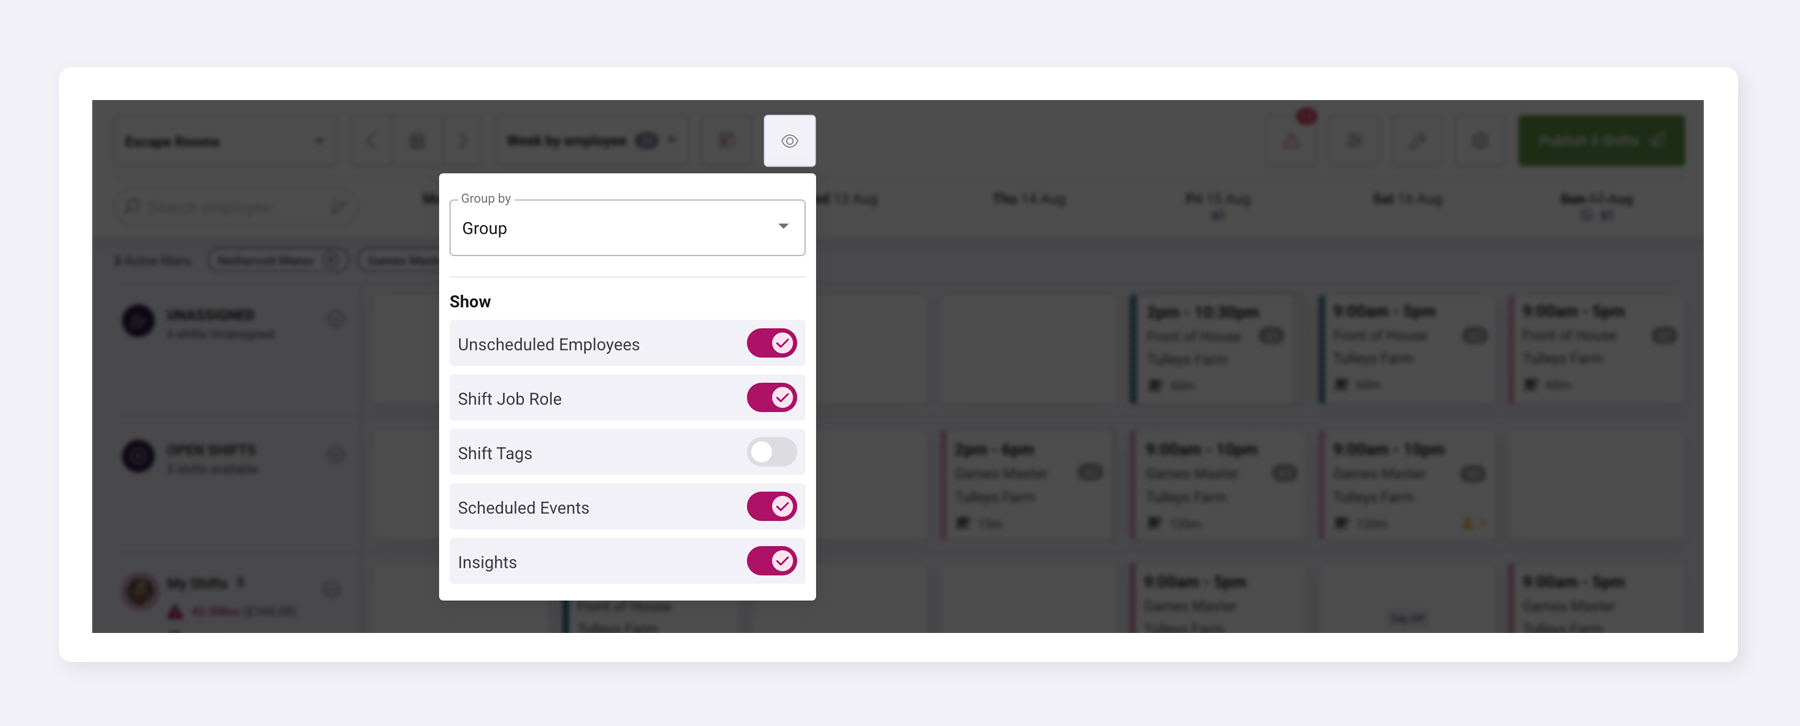
Once your groups are set up, you can choose to sort your employees by groups on the Schedule. Go to your Schedule page, click the 'View' menu at the top of page, and select 'Group' from the 'Group By' options.

Can employees be bulk-assigned to a group?
Yes! To bulk-assign employees to a group, go to your 'Team' page and select the employees you'd like to assign a group to. Next, click the 'Bulk Actions' dropdown menu, choose 'Assign Group,' and select the appropriate group name from the available options.
Was this article helpful?
That’s Great!
Thank you for your feedback
Sorry! We couldn't be helpful
Thank you for your feedback
Feedback sent
We appreciate your effort and will try to fix the article