Shifts are the cornerstones of your schedule; the real key players. Learn how to set them up, and you'll have the full power of Shiftie right at your fingertips. You know, so long as you understand all the other bits too.
1. Head over to the scheduling page by clicking on the 'Scheduling' calendar icon on the left of your screen. You'll default to the week view, but you can change view if you want to.
2. Find the date range you want to add shifts for, then find the employee you want to create a shift for, using the search bar if necessary. You can also choose to create a shift in the unassigned row, ready to assign to an employee later, or in the open shifts row if you want your team to volunteer for shifts.
3. Once you've found the right row, click the plus button on the relevant day. If the day already has a shift set up you'll need to click on it and select 'Add Shift' from the dropdown menu.
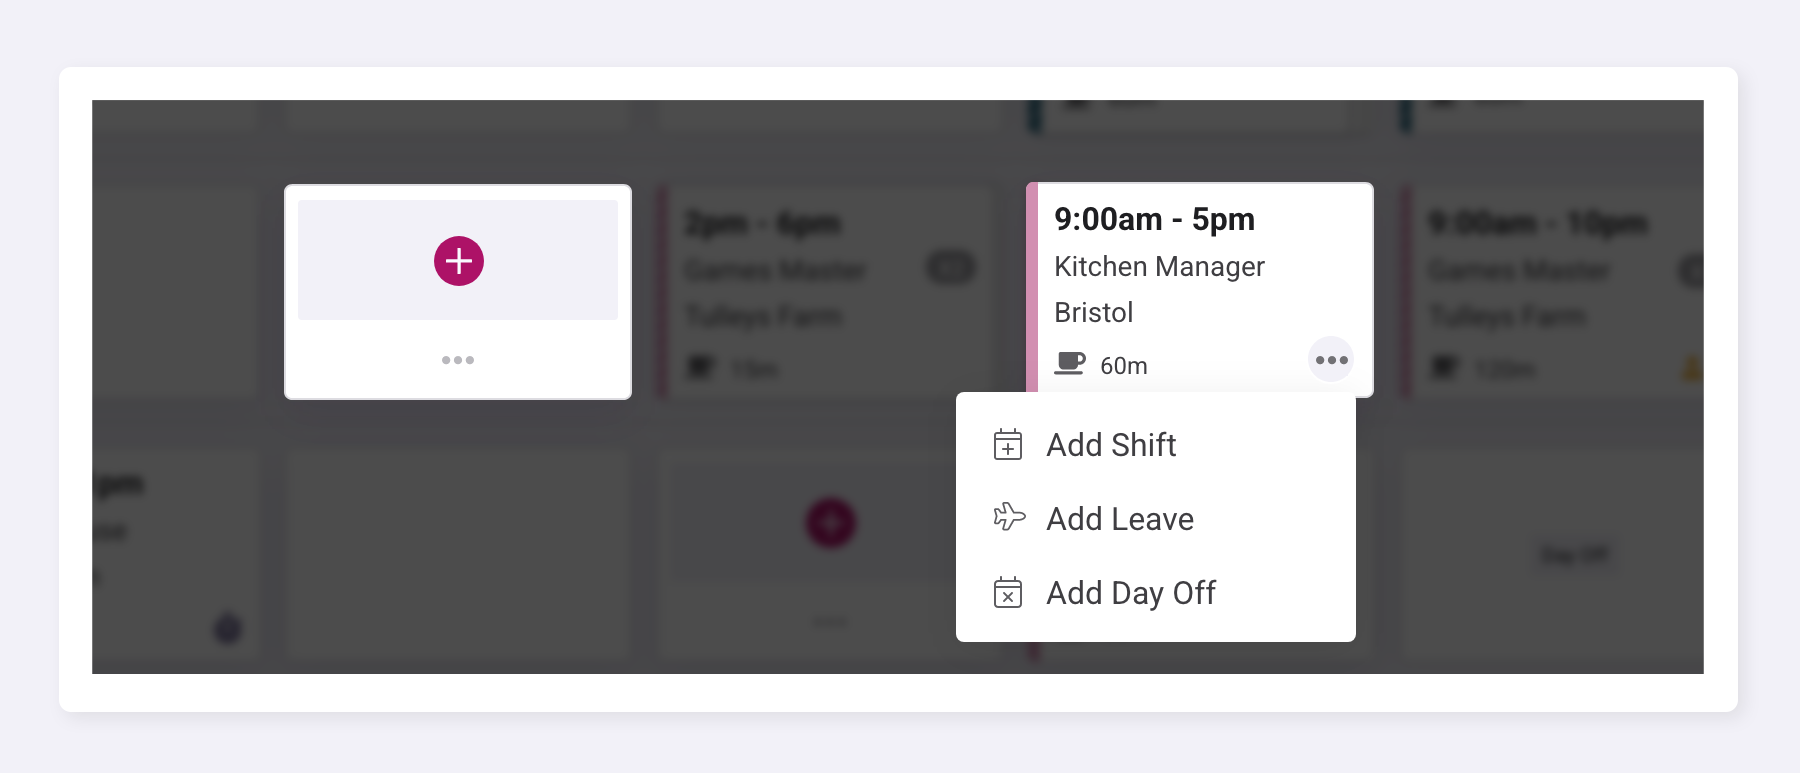
4. If you're creating a standard shift you'll be able to select the shift template from the list. (You'll only see templates that are suitable for the selected employee's job role, and if the employee isn't available for any of the templates because of pre-existing shifts or unavailability they'll be greyed out.) Once you've selected the template the shift will automatically be created.
5. If you want to create a shift that you don't have a template for, then you'll need to fill out the times within the shift modal.
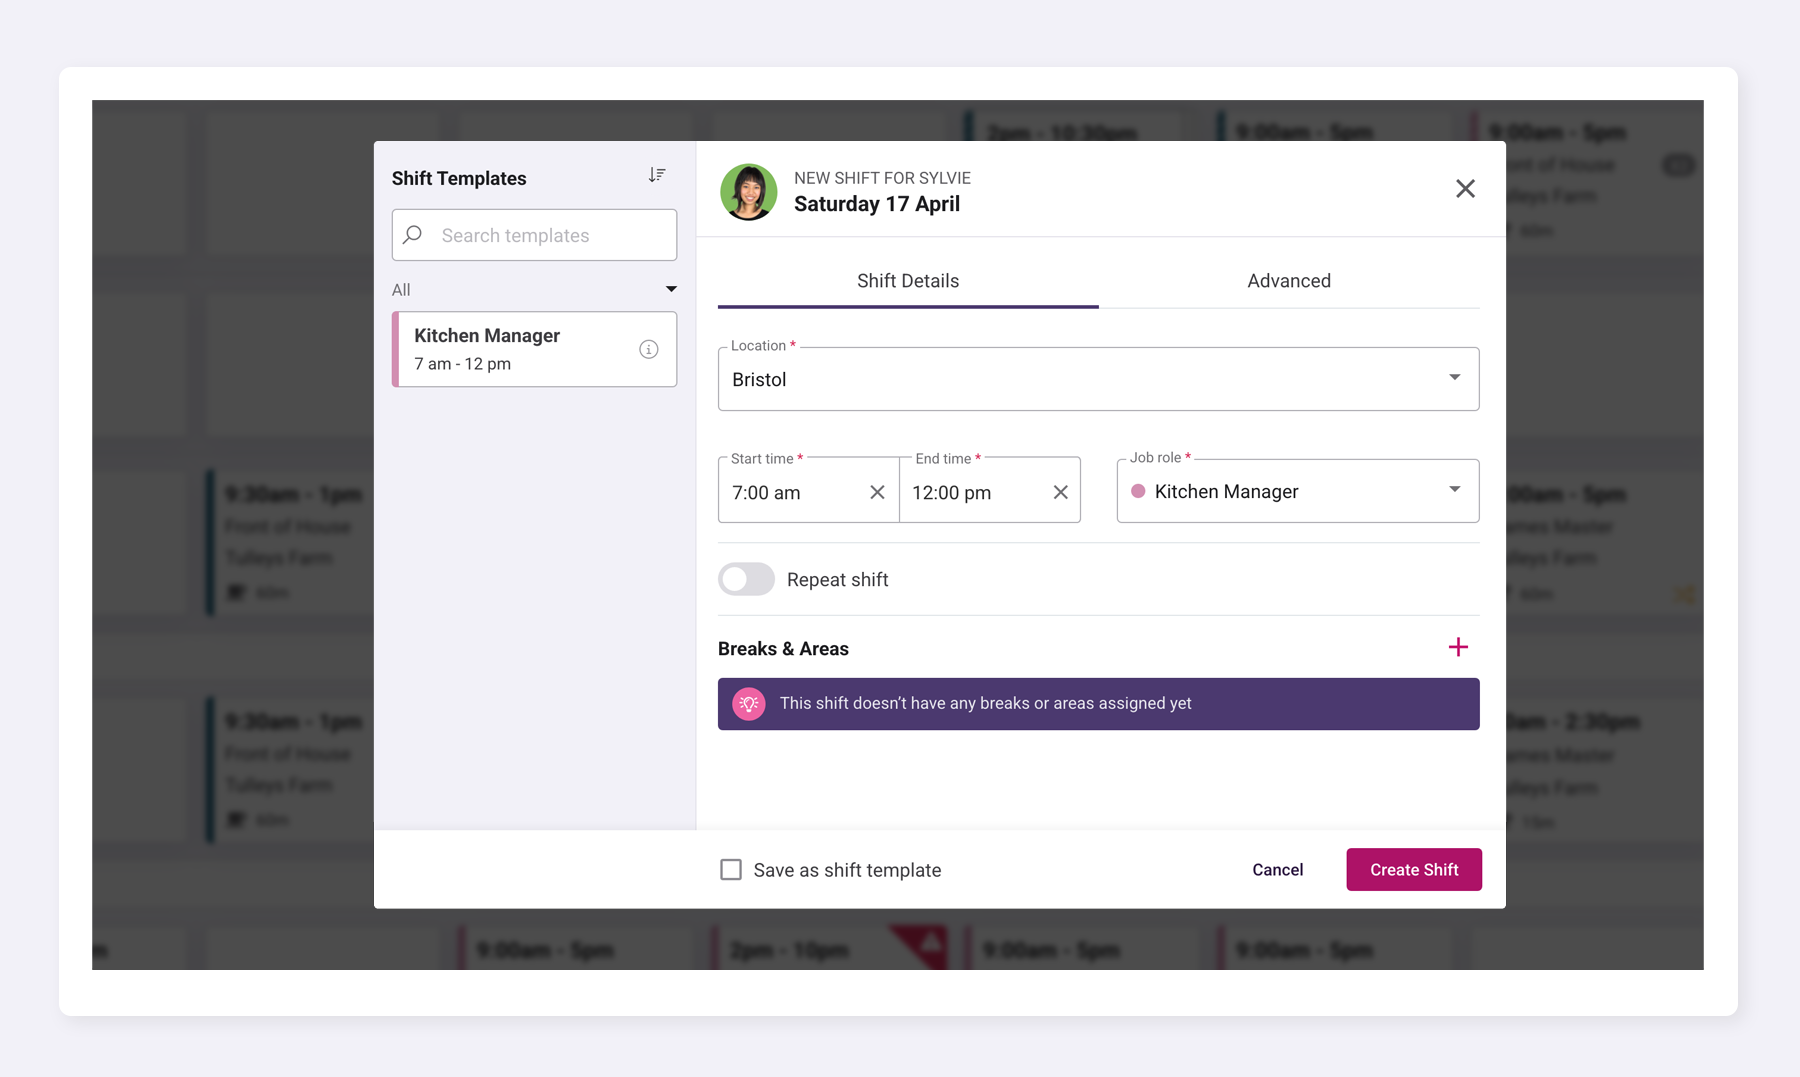
a. If you're adding an open shift, you can choose whether employees will be able to claim shifts without supervision or if a manager will need to approve the allocation once someone's volunteered to work.
b. Make sure to choose the job role for the shift, and then select the start and end times if not using a template.
c. If employees are entitled to a break during their shift, you can set the length and choose whether it's paid or unpaid, just click the '+' button to add a break or an area. This will feed through to the time entry for the shift. The default value can be changed in your settings.
d. You can choose to add ‘tags' to the shift as well; you can add or edit these if the one you want isn't showing, just click on the 'Advanced’ tab.
e. If you don't want employees to be able to see when a shift is scheduled to end, click ‘Advanced’ and tick the 'Hide Shift End Time' field. The end time will still show for you and other managers, but it'll be hidden from employees.
f. If you have any specific comments about this shift - for instance, if it will involve anything out of the ordinary - you can add these in the notes field via the ‘Advanced’ tab.
g. If you're planning on creating more shifts like this again in the future, you can choose to save it as a template.
h. Once you're done, click ‘Create Shift' - just so you’re aware, employees are only notified once the shifts are published.
When you're ready, you can click the 'Publish x Shifts' button in the top right of your schedule screen to publish all, or by clicking on the three dots in the right-hand corner of the shift tile, to publish individual shifts.
Was this article helpful?
That’s Great!
Thank you for your feedback
Sorry! We couldn't be helpful
Thank you for your feedback
Feedback sent
We appreciate your effort and will try to fix the article